Shopify
This guide goes through the process of connecting your Shopify store to Nexae. Once this has been set up, your Shopify orders will automatically be imported in to Nexae, ready for a shipping label to be generated.
Step 1) Press the integration button on the sidebar.

Step 2) Press the 'Add Integration' button and enter your Shopify store name or URL, e.g. yourstore or yourstore.myshopify.com.
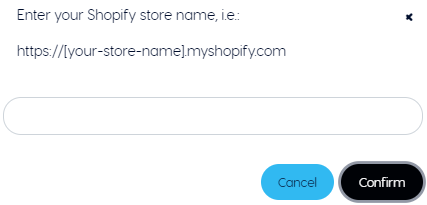
Once entered, press 'Confirm'.
Step 3) You will be prompted to log in to your Shopify account if you are not already. Once logged in, you will be able to go over the permissions we require to access your store. To continue with the integration press the "Install App".
Step 4) You will be redirected back to Nexae, if the integration was successful you will be able to see your Shopify store listed.
Update Shopify Store Settings
To update your store's settings on Nexae, first go to your Current Integrations and select the Pencil icon for your Shopify integration.

From within the Integration Settings page you will be able to alter the settings used by Nexae for your store.
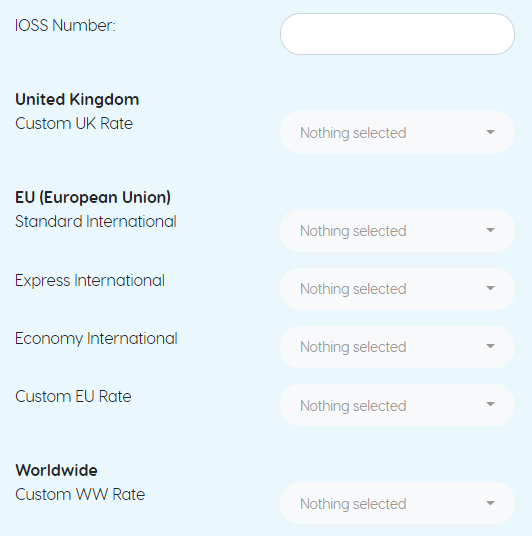
IOSS Number will be required for some routes, add the IOSS number associated with your Shopify store within the settings page.
- Map your Shopify shipping rates within 'Settings' page under shipment rules, which will automatically convert your Shopify shipping rate in to a Nexae delivery stream. For more on this, click here.
Within the settings page, you will also be able to define the estimated delivery time and description for each delivery route, which will alter how the route appears on checkout:


View Shopify Orders on Nexae
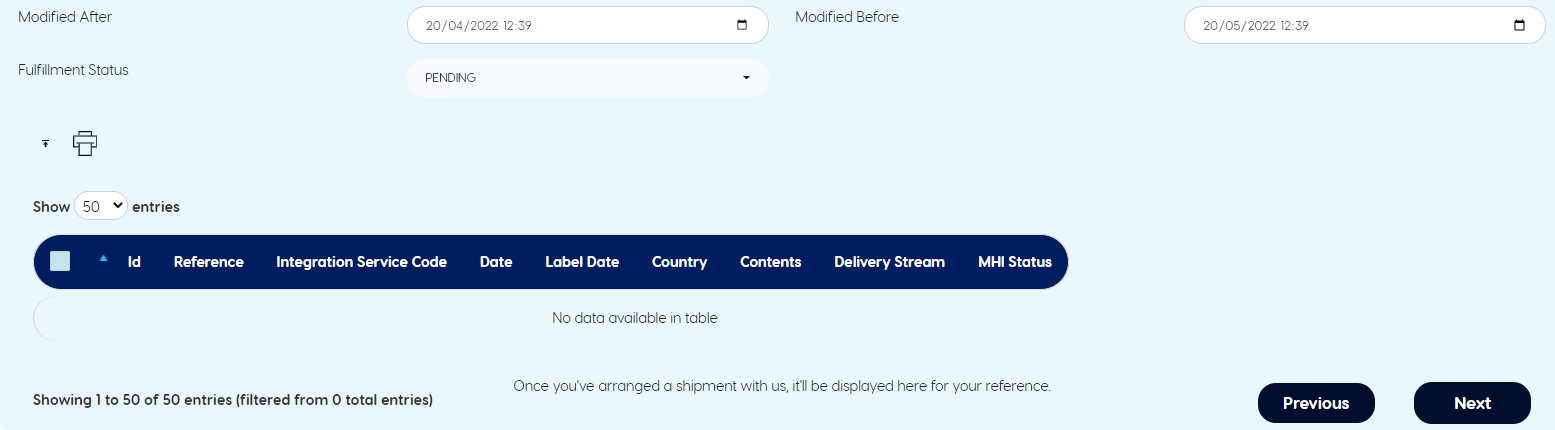
You can view your Shopify orders from within Nexae by going to the Integration Shipments page. Here, you will be able to print shipping labels, edit the address and track your shipments.
Quick Links:
Click here to integrate your Shopify store with Nexae.
Click here to view all of your Shopify orders within Nexae.